This tutorial will show you how to create a targeted MS2 assay that uses heavy standards for absolute quantitation. The Biognosys PQ500 standard is used as the source of heavy standards. We used the Vanquish Neo LC, ES906A column and a trap-and-elute injection scheme with a 60 SPD method and a 100 SPD method. The gradients have been designed so that compounds elute over a large portion of the experiment spans.

Pierce retention time calibration mixture (PRTC) is used here to create an indexed retention time (iRT) calculator. Along with a spectral library, the iRT calculator will aid Skyline in picking the correct LC peaks in the steps that follow. See the Skyline iRT tutorial for more details. Here we will use an iRT calculator created with Koina. After setting up the LC and column, we run unscheduled PRTC injections to ensure that the LC and MS system is stable. The method file 60SPD_PRTC_Unscheduled.meth can be used for this. The prtc_unscheduled.csv file could be used to import into a tMSn table if making a method from scratch. We like to use Auto QC with Panorama to store all our files, and to automatically upload and visualize QC data.
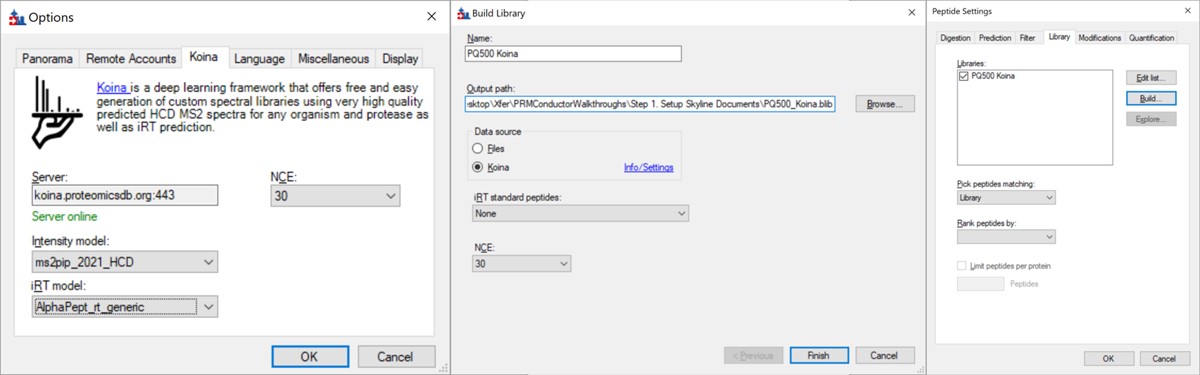
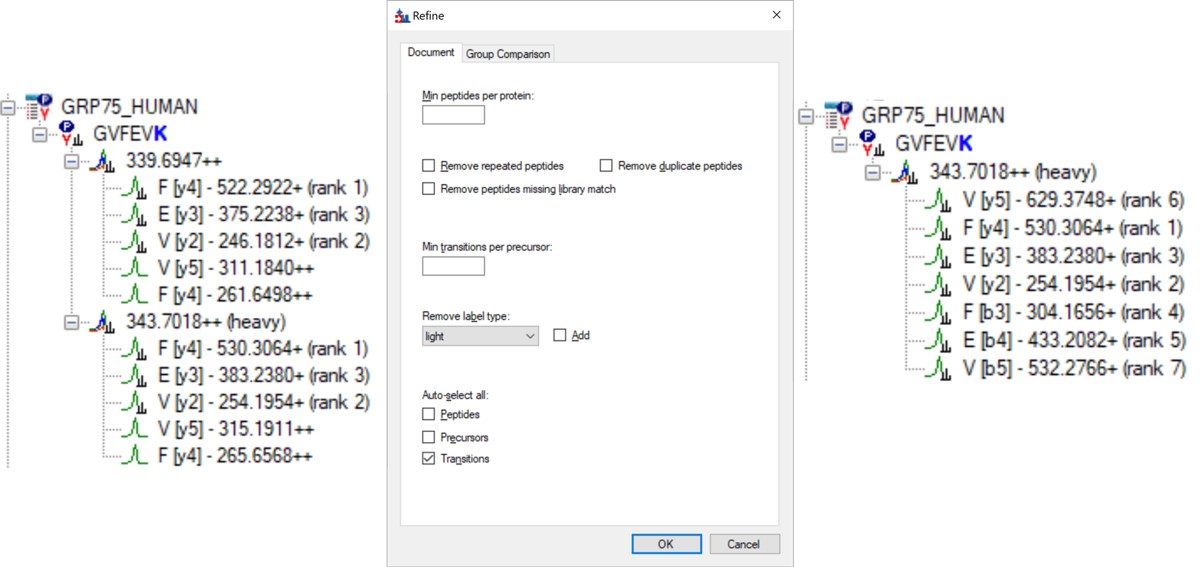
Now we will create a Skyline document for analyzing PQ500 heavy labeled peptides. Biognosys supplies a transition list with intensities and iRT values that can be used to create a spectral library and iRT calculator. We'll show you though also how you can use use Koina integration with Skyline to create a spectral library and iRT library from a list of peptides sequences if you don't know anything about them. We also tend to like to use Koina spectral libraries even if supplied lists of transitions, because we will be using PRM Conductor to automatically filter the transitions. At the end of this section, we’ll be ready to perform unscheduled PRM for the PQ500 heavy-labeled peptide standards.
Open up Skyline Daily and create a new document. Save the document as Step 1. Setup Skyline Documents/pq500_60spd_neat_multireplicate.sky.
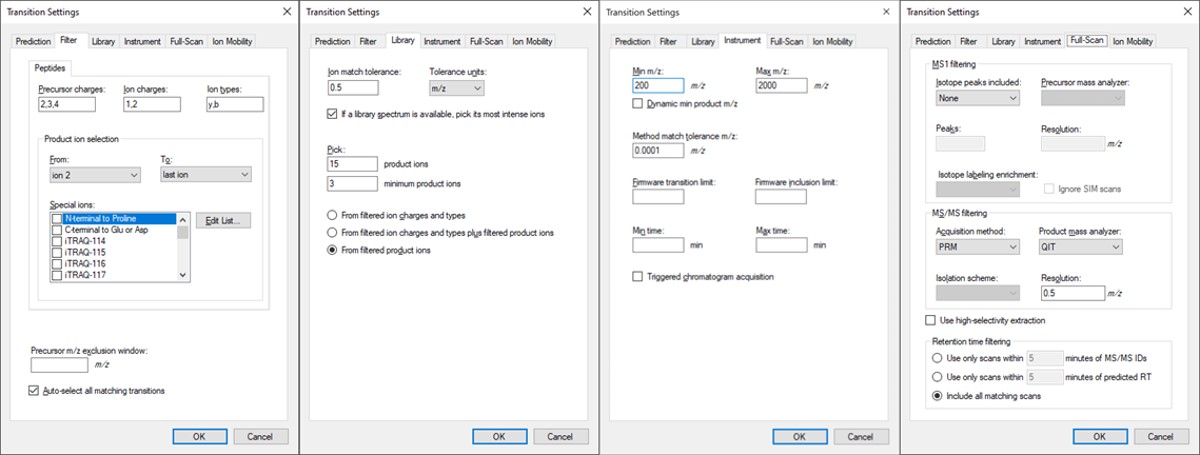
Open Settings / Peptide Settings.

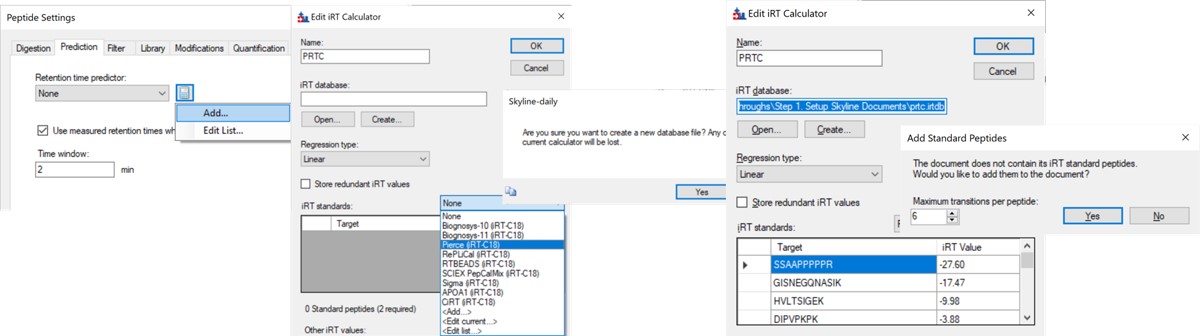
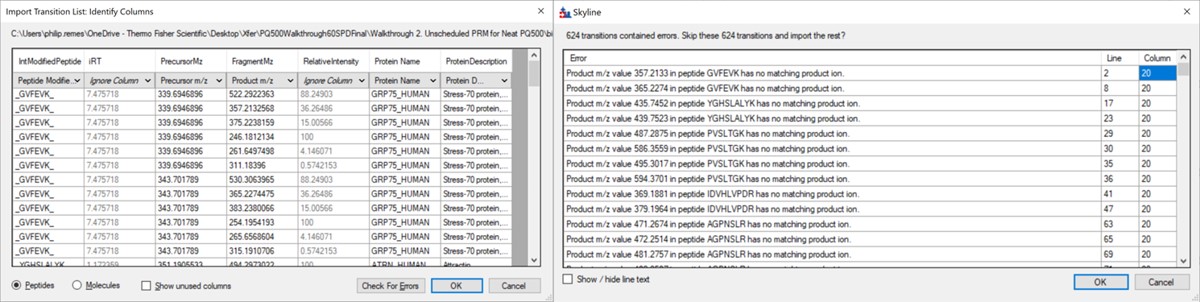
Use File / Import / Transition List and select the file Step 1. Setup Skyline Documents/biognosis_pq500_transition_list.csv. A dialog opens that shows the mapping of the file headers to Skyline variable names. Press Okay to continue on. A new dialog prompts us that 624 transitions are not recognized. These are water losses that we don't necessarily need. We could define water loss transitions in the Settings tabs if we really wanted them. Press Okay twice to exit the iRT calculator dialogs. A new dialog will ask if you want to add the Standard Peptides, choose 6 transitions and press Yes.
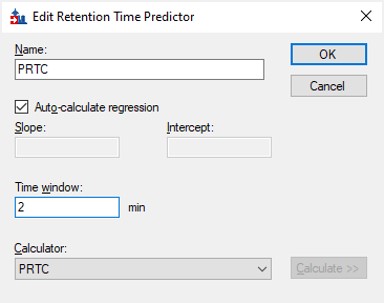
Another dialog appears, asking if we want to make an iRT calculator. The Biognosys values are presumably based on experiment, and are slightly more accurate than the in silico predicted iRT values from Koina, so Click Create. You'll be asked if you want to create a spectral library from the intensities in the transition list. Feel free to press Create if you want, but we will press Skip and use Koina to predict the intensities next. The Skyline document will update and in the bottom right border will be displayed 579 prot, 818 pep, 1622 prec, 9020 tran.

Now we’ll generate a spectral library with Koina.
| Attached Files | ||
step1_pq500_create_irtdb.jpg step1_pq500_import_trans.jpg step1_pq500_pep_settings.jpg step1_pq500_query_want_irt.jpg step1_pq500_throughputs.jpg step1_pq500_trans_settings.jpg step1_irt_calc_window.jpg step1_pq500_rmv_lights_auto_trans.jpg step1_koina_options.jpg